Complete Guide to Professional Hair Coloring Techniques
Master balayage, highlights, foilyage, babylights and more. Lightening techniques explained step by step for professional colorists.
Blendsor
Blendsor Team
Complete Guide to Professional Hair Coloring Techniques
“I want something natural, like the sun kissed my hair.” You hear this phrase every week. But which technique is really right for your client? Balayage, foil highlights, babylights, foilyage?
The answer isn’t always the same. Each technique has its place, advantages, and limitations. Choosing wrong means results that don’t convince or costly maintenance for the client.
In this guide, we’ll go through the most in-demand professional coloring techniques. How they work, when to use them, and the keys to executing them correctly.
Classification of Coloring Techniques
Before diving into each technique, it’s useful to understand how they’re classified:
By Isolation Method
| Method | Techniques | Characteristics |
|---|---|---|
| With foil | Traditional highlights, foilyage | Greater lift, defined contrast |
| Without foil | Balayage, ombre | More natural effect, smooth transitions |
| Mixed | Teasylight, babylights | Combines precision and naturalness |
By Final Effect
| Effect | Techniques | Result |
|---|---|---|
| High contrast | Traditional highlights | Defined blondes vs dark base |
| Natural | Balayage, babylights | ”Sun-kissed”, almost imperceptible |
| Gradient | Ombre, sombré | Transition from dark to light |
| Dimension | Lowlights, color melt | Depth with multiple tones |
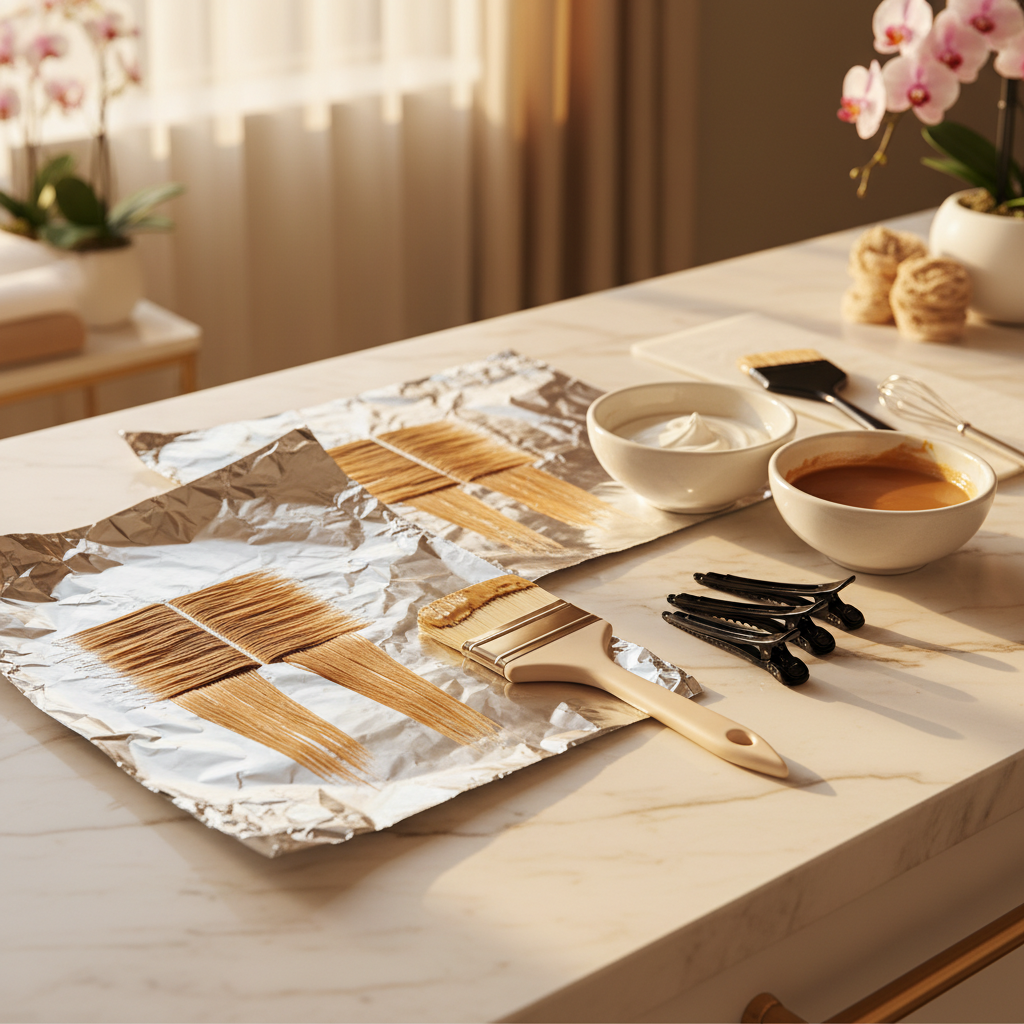
Traditional Foil Highlights
The classic technique that remains fundamental in any salon.
How It Works
Hair sections are isolated and wrapped in aluminum foil with lightening product. The foil serves three functions:
- Retains heat from the scalp
- Accelerates the chemical process
- Prevents product from touching other sections
When to Choose Them
Foil highlights are ideal when:
- The client wants powerful, visible lift
- Hair is dark (level 2-4) and wants to go blonde
- It’s the first significant lightening
- Looking for a defined “salon” effect
Not ideal when: The client wants low maintenance (roots show quickly) or wants a very natural look.
Typical Formulation
The chemistry behind highlights requires precise balance. According to the Society of Cosmetic Chemists, hydrogen peroxide acts by oxidizing the hair’s melanin:
Lightening powder + 20-30 vol developer
Ratio: 1:2 (powder:developer)
Time: Check every 10-15 minutes
Application Technique
- Section the hair into panels (nape, sides, crown)
- Weaving or zig-zag: Separate fine strands from the section
- Place the foil under the selected strands
- Apply the product from mids to ends, then roots
- Close the foil without pressing too tight
- Monitor development every 10-15 minutes
Common Mistakes
- Over-saturating: Product escapes edges and stains
- Uneven sections: Irregular result
- Not monitoring time: Foil retains heat, can over-process
- Closing too tight: Marks the hair
For a detailed comparison with other techniques, check out our guide on balayage vs traditional highlights.
Balayage: The Art of Sweeping
“Balayage” comes from the French word for “sweeping.” Developed in Paris in the 1970s, this freehand technique creates natural, graduated effects. According to the Professional Beauty Association, balayage has become one of the most requested techniques worldwide.
How It Works
Product is applied directly to the hair with brush strokes, without foil. The ends receive more product than the roots, creating a natural gradient.
Characteristic Result
- Graduated effect from dark to light
- Smooth transitions without demarcation lines
- “Sun-kissed hair” appearance
- Roots grow out without marking
When to Choose It
| Situation | Balayage? |
|---|---|
| Wants natural effect | Yes |
| Low maintenance | Yes |
| First subtle lightening | Yes |
| Wants significant lift | No |
| Has a lot of gray hair | No |
Typical Formulation
Lightening powder with clay (more adhesive)
20-30 vol developer
Ratio: 1:1.5 to 1:2
Time: Variable (monitor without foil)
Application Technique
- Prepare the product: Yogurt consistency, not liquid
- Section into panels: Work from bottom to top
- Select strands: Finer on top, thicker below
- Brush technique:
- Brush angled at 45°
- Sweeping motion from bottom to top
- More product on ends, less on mids
- Don’t reach the root
- You can use plastic to separate (not foil)
- Monitor development visually
Keys to Perfect Balayage
Pro tip: The secret is in gradual saturation. Ends should be saturated, mids with visible but not saturated product, and the zone near the root with barely a touch.
- Product amount: More on ends, less going up
- Strand tension: Keep stretched while applying
- Distance from root: Minimum 3-5 cm
- Product consistency: Neither too liquid nor too thick
Foilyage: The Best of Both Worlds
Foilyage combines the sweeping technique of balayage with the lifting power of foil.
How It Works
You apply the product with balayage technique (sweeping), but then wrap in aluminum foil to enhance lifting.
When to Choose It
- Client wants balayage effect but has dark hair
- Need more lifting power than traditional balayage
- Hair is resistant and needs heat
- Want to maintain smooth transitions with more contrast
Typical Formulation
Lightening powder (can be standard or with clay)
20-30 vol developer
Ratio: 1:2
Time: Shorter than open balayage
Application Technique
- Apply like balayage: Sweep from bottom to top
- Place foil underneath before applying
- Close the foil after saturating
- Monitor more frequently: Foil accelerates the process
- Remove earlier than traditional highlights
Key Differences from Traditional Highlights
| Aspect | Traditional Highlights | Foilyage |
|---|---|---|
| Application | Uniform root-to-ends | More on ends |
| Demarcation line | Visible | Diffused |
| Effect | High contrast | Enhanced natural |
| Maintenance | Frequent | Moderate |
Babylights: Ultra-Natural Dimension
Babylights mimic children’s hair: ultra-fine strands that add light without revealing the work.
How It Works
Extremely fine strands (almost hair by hair) are selected and lightened with foil. The result is so subtle it looks natural.
Characteristic Result
- Almost imperceptible dimension
- Natural shine
- Ideal for “breaking up” a flat base
- Effect of healthy, luminous hair
When to Choose Them
- Conservative clients who want a subtle change
- Natural blondes who want more light
- Soft camouflage of first grays
- Maintenance of other lightening services
Typical Formulation
Gentle lightening powder
10-20 vol developer (depending on base)
Ratio: 1:2
Time: 20-30 minutes typical
Application Technique
- Very fine sections: 0.5-1cm thick
- Ultra-fine weaving: Almost hair by hair
- Small foils: More manageable
- Apply with precision: Less product than highlights
- Distribute throughout the head: Including hairline
Expert Advice
Pro tip: Babylights work best when combined with other techniques. For example, balayage on mids/ends + babylights on contour and crown.
Color Melt: The Perfect Gradient
Color melt is a fusion technique that creates imperceptible transitions between colors.
How It Works
Multiple tones are applied that “melt” into each other, without visible separation lines. Can be with bleach or direct dyes.
Characteristic Result
- Color transitions without jumps
- Multidimensional effect
- Can combine warm and cool tones
- Highly customizable
When to Choose It
- Client wants multiple tones
- Correcting previous work with marked lines
- Creating depth in flat hair
- Creative looks with fantasy colors
Basic Technique
- Define the tones: Minimum 2, maximum 4 to start
- Apply the darkest at root/upper zone
- Apply intermediate tones in mids
- Apply the lightest on ends
- Blend the joins with brush or comb
- Process together so colors mix
Lowlights: Adding Depth
Lowlights are the opposite of highlights: they add dark tones to create depth.
When to Use Them
- Blondes who want more dimension
- Correcting overly uniform lightening
- Adding natural contrast
- Reducing maintenance of very light blondes
Formulation
- Use permanent dye (not bleach)
- 1-2 levels darker than the lightest base
- Natural or slightly warm reflects
- 10-20 vol developer
Technique
Applied the same as highlights, but with dark dye instead of bleach. The goal is for them to integrate, not stand out.
Teasylight: Texture and Diffusion
Hybrid technique that combines backcombing (teasing) with lightening to create diffused effects.
How It Works
- Lightly backcomb the section at the root
- Product only touches the non-backcombed hair
- Result is a naturally diffused root
Advantages
- Super natural roots
- Less maintenance
- Ideal for first-time lightening
- Less damage at root
Caution
Don’t backcomb too much or too hard. It can damage the cuticle and create tangles that are difficult to undo.
Technique Comparison Table
| Technique | Naturalness | Lifting Power | Maintenance | Difficulty | Time |
|---|---|---|---|---|---|
| Traditional highlights | Medium | High | Frequent | Medium | 60-90 min |
| Balayage | High | Medium | Low | High | 45-75 min |
| Foilyage | High | High | Low | High | 60-90 min |
| Babylights | Very high | Low | Medium | Medium | 90-120 min |
| Color melt | Variable | Variable | Low | High | Variable |
| Lowlights | High | N/A | Low | Medium | 45-60 min |
| Teasylight | Very high | Medium | Very low | High | 60-90 min |
How to Choose the Right Technique
The choice depends on several factors. Ask your client these questions:
1. How much maintenance are they willing to do?
- Little → Balayage, foilyage, teasylight
- Normal → Traditional highlights, babylights
- Frequent → Any technique
2. How dramatic a change do they want?
- Subtle → Babylights, soft balayage
- Noticeable → Highlights, foilyage
- Dramatic → High-contrast highlights, ombre
3. What’s their current level?
- Dark (1-4) → Highlights or foilyage (need power)
- Medium (5-7) → Any technique works
- Light (8-10) → Babylights or soft balayage
4. Do they have gray hair?
- Yes (>30%) → Highlights with prior coverage
- Few → Any technique, babylights to camouflage
5. What’s the hair condition?
Assessing hair health before any chemical service is essential. The International Association of Trichologists recommends always performing a porosity and elasticity analysis before lightening:
- Virgin → Any technique
- Treated → Gentle techniques, less chemical
- Damaged → Prioritize health, minimal lightening
Technique Combinations
The best results often come from combining techniques:
Balayage + Babylights
- Balayage on mids and ends
- Babylights on contour and crown
- Result: Depth + facial brightness
Highlights + Lowlights
- Blonde highlights to lighten
- Lowlights to add depth
- Result: Complete dimension
Foilyage + Color Melt
- Foilyage to lighten ends
- Color melt to fuse with root
- Result: Powerful but natural gradient
Common Mistakes in Lightening Techniques
1. Not Adapting Technique to Hair
Error: Doing balayage on level 3 hair expecting platinum blonde. Solution: Choose technique based on starting point and realistic goal.
2. Incorrect Saturation
Error: Same amount of product at root as ends. Solution: Always more product where you want more lift.
3. Inconsistent Sections
Error: Different thickness strands give irregular results. Solution: Work with system and consistency.
4. Not Considering Maintenance
Error: Beautiful technique today, impossible to maintain. Solution: Discuss maintenance BEFORE the service.
Frequently Asked Questions
Which technique is easiest to maintain?
Balayage and teasylight are the lowest maintenance techniques because the root grows naturally without a visible demarcation line. A client can wait 3-4 months between services without noticeable growth.
Can I do balayage on very dark hair?
Yes, but with realistic expectations. On level 2-3 hair, balayage will achieve caramel or honey tones, not platinum blonde. For very light blondes on dark bases, foilyage or traditional highlights are more effective.
Do babylights cover gray hair?
They don’t cover, but they can camouflage scattered grays (less than 20%) by adding dimension that distracts the eye. For concentrated grays or more than 30%, you need traditional coverage before lightening work.
How long do results from each technique last?
Depends on growth and contrast: traditional highlights need touch-up every 6-8 weeks, balayage every 12-16 weeks, babylights every 8-12 weeks. Natural base color also influences this.
Can I combine multiple techniques in one service?
Yes, and often it’s recommended. For example, highlights on top for powerful lift, balayage on the bottom for natural transition, and babylights on the face-framing for light.
In Summary
Professional coloring techniques are chosen based on:
- The client’s goal: Natural vs dramatic, high vs low maintenance
- The starting point: Level, hair condition, history
- Your skills: Each technique requires specific practice
- Available time: Some techniques are faster than others
There’s no “better” technique than another. There are techniques appropriate for each situation. The best colorist is one who knows when to use each one.
Want personalized formulas for each technique? Try Blendsor free. The AI suggests specific formulations based on the chosen technique and your client’s hair.
This guide is the starting point for the techniques cluster. Explore related articles to dive deeper into each specific technique.
Want scientific precision in your formulas?
Blendsor analyzes photos and generates exact formulas for your clients.
Try for free